
Cassette CD Conversion:Cassette CD conversion is the single most important thing you can do for those dusty tapes sitting in your attic right now. Think about it. Somewhere in your home, there’s probably a box of cassette tapes old mixtapes, family recordings, concerts nobody ever released digitally, maybe a demo your band recorded in 1994. They feel solid. They look fine. But inside every one of those plastic shells, magnetic particles are slowly releasing from the tape base and taking your memories with them.
This isn’t a scare tactic. It’s physics. Magnetic tape degrades whether you play it or not and the clock started ticking the day those tapes were recorded. The good news? Cassette CD conversion is more accessible, more affordable, and more achievable than most people realize. Whether you go DIY or hire professionals, this guide walks you through every step of the process.Let’s save those tapes before it’s too late.
Why Cassette CD Conversion Matters More Than You Think
The Sad Truth About Cassette Tape Degradation
Magnetic tape is a remarkable technology. A thin plastic strip coated with iron oxide particles captures and stores audio with surprising fidelity. But that same chemistry is also its fatal weakness.
Over time, the binder the adhesive layer that holds magnetic particles to the tape base absorbs moisture from the air and begins to break down. This process is called binder hydrolysis and it’s responsible for what audio archivists grimly call “sticky shed syndrome.” When a tape suffering from sticky shed plays, the binder literally sheds onto the tape heads, gumming up the mechanism and potentially destroying the tape permanently during playback.
Beyond sticky shed, cassette tapes face several other degradation threats:
- Magnetic particle loss — particles gradually detach from the tape surface, creating dropouts and audio gaps
- Tape stretching — heat and repeated playback stretch the tape, causing speed inconsistencies
- Mold growth — humid storage conditions breed mold that physically destroys tape surface
- Print-through — magnetic signals from one tape layer bleed into adjacent layers, creating ghost echoes
- Oxidation — iron oxide particles oxidize over time, reducing magnetic strength and audio fidelity
The average cassette tape lifespan under decent storage conditions runs approximately 10 to 30 years. Many tapes already exceed that range. Every year you delay cassette to CD conversion, you lose a little more of what those tapes contain.
What You Risk Losing Forever
Some losses are replaceable. Others absolutely aren’t.
Commercial albums you recorded off the radio? You can probably find those on streaming services. But consider what else might live on those tapes:
- Family recordings — grandparents’ voices, children’s first words, holiday gatherings from decades past
- Original music — demos, rehearsals, and live recordings that exist nowhere else on earth
- Personal mixtapes — curated collections representing specific moments in your life
- Oral histories — interviews, stories, and memories recorded before digital existed
- Rare live performances — bootleg concerts of artists who never officially released that show
These recordings have zero commercial value and infinite personal value. No streaming service carries your grandmother’s birthday message from 1987. No archive holds your high school band’s demo tape. Cassette tape digitization preserves these irreplaceable artifacts before degradation makes recovery impossible.
Why CD Still Makes Sense as a Format
In a streaming-dominated world, recommending CD as a conversion target might seem old-fashioned. It isn’t. Here’s why CD remains an excellent archival format for converted cassette audio:
- Longevity — properly stored CDs last 50 to 100 years, far outlasting magnetic tape
- Universal compatibility — virtually every home has a CD player or computer that reads them
- No subscription required — your music stays yours without monthly fees or service shutdowns
- Tangible backup — physical media you can hold, label, and store independently
- Gift-friendly — converted family recordings on CD make genuinely meaningful gifts
CD also serves as an excellent archival bridge. Many people convert cassettes to CD first and then rip those CDs to digital files getting the best of both physical and digital preservation simultaneously.
Understanding Cassette CD Conversion — The Basics
How Cassette to CD Conversion Actually Works
The fundamental process of cassette CD conversion involves three stages. First, you play the cassette tape and capture the analog audio signal. Second, you convert that analog signal into digital audio data. Third, you write that digital data onto a blank CD in a format that CD players can read.The critical conversion happens at stage two analog to digital conversion (ADC). Your cassette tape stores audio as continuously varying magnetic patterns that’s analog. Your CD stores audio as binary data ones and zeros that’s digital. The ADC process samples the analog signal thousands of times per second and assigns a numerical value to each sample.Two numbers define the quality of that conversion:
Sample Rate how many times per second the analog signal gets measured. Standard CD quality uses 44,100 samples per second (44.1kHz). Higher sample rates capture more detail but CD format only uses 44.1kHz anyway.Bit Depth how many gradations of volume each sample can represent. CD standard uses 16-bit, providing 65,536 possible volume levels. Higher bit depth captures more dynamic nuance during recording before final export.The quality of your analog-to-digital conversion determines your ceiling. No amount of software processing improves audio that was poorly captured at the source.
Different Conversion Methods Overview
Three main approaches exist for cassette to CD conversion and each serves different needs:
| Method | Best For | Audio Quality | Cost | Effort Required |
| DIY Home Setup | Tech-comfortable users | Excellent (with good equipment) | $50–$200 setup | High |
| Professional Service | Irreplaceable recordings | Excellent | $10–$30 per tape | Minimal |
| All-in-One Device | Convenience seekers | Good | $50–$150 | Low |
Each approach has genuine merit. Your choice depends on how many tapes you’re converting, how irreplaceable they are, your technical comfort level, and your budget.
DIY Cassette to CD Conversion — Step by Step
Preparing Your Cassette Tapes Before Converting
Never skip tape preparation. Playing a damaged or dirty tape through your deck risks destroying both the tape and your equipment. Take 15 minutes to assess each tape before conversion begins.
Basic tape inspection checklist:
- ✅ Check for visible mold — white or green fuzzy growth on the tape surface
- ✅ Look for broken or tangled tape inside the shell
- ✅ Check the tape for creasing or wrinkling
- ✅ Verify the tape spools turn freely when you rotate them with a pencil
- ✅ Smell the tape — a strong vinegar odor indicates acetate base deterioration
- ✅ Rewind fully before first playback to ensure even tape tension
Cleaning your tape deck matters enormously. Dirty tape heads introduce noise and reduce high-frequency response. Use a cotton swab dampened with isopropyl alcohol (90%+) to clean the playback head, capstan, and pinch roller. Let everything dry completely before inserting a tape.
For tapes showing sticky shed syndrome where the tape feels tacky or leaves residue on the heads baking can temporarily restore playability. Place the tape in an oven at 130°F (54°C) for 4–8 hours. This drives out absorbed moisture and temporarily restores the binder. Baking buys you one good playback for capture use it wisely.
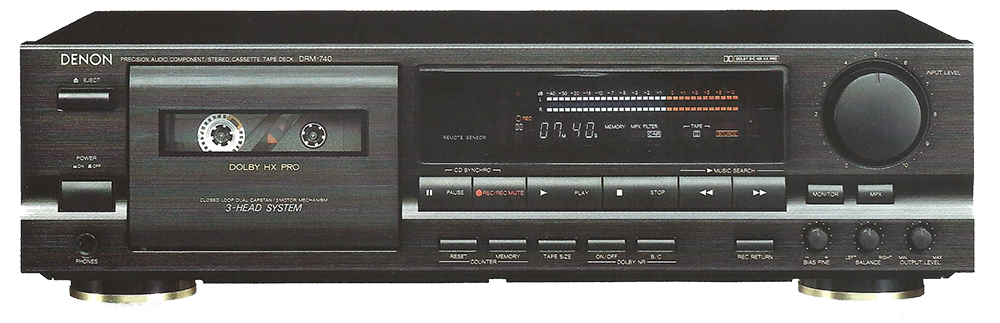
Setting Up Your Cassette to CD Conversion Equipment
Your signal chain determines your quality ceiling. Here’s the recommended setup for DIY cassette tape to digital conversion:
Option 1 — Best Quality Setup:
- Decent cassette deck with RCA output jacks
- External USB audio interface (connects to computer)
- RCA to 3.5mm or RCA to RCA cable connecting deck to interface
- Computer running audio recording software
- CD burning software for final output
2 — Budget Setup:
- Cassette player with headphone output
- Connect a 3.5mm to 3.5mm cable to the line-in port of the computer.
- Free recording software
- CD burning software
Option 3 — USB Cassette Converter:
- All-in-one USB cassette player that connects directly to computer
- Simplest setup but limited audio quality
- Fine for casual recordings, not ideal for irreplaceable content
Set your input levels carefully. During a test playback, watch your recording software’s level meters. Peaks should reach approximately -6dB to -3dB loud enough for good signal-to-noise ratio but with enough headroom to prevent clipping on louder passages. Clipped audio where peaks exceed 0dB and distort cannot be fixed in post-processing.
Recording and Capturing Audio from Cassette
Open your recording software and configure these settings before hitting record:
- Sample rate: 44.1kHz (CD standard)
- Bit depth: 16-bit minimum — 24-bit preferred for recording before final export
- Channels: Stereo
- File format: WAV for maximum quality during editing
Press record in your software first and then press play on the tape deck. Record the entire tape side without interruption. Don’t try to skip silences during capture edit them out afterward. Stopping and restarting during recording creates gaps and level inconsistencies that complicate editing significantly.
Free and affordable recording software options:
- Audacity — free, powerful, excellent for cassette conversion
- GarageBand — free on Mac, intuitive interface
- Adobe Audition — professional-grade, subscription-based
- WavePad — affordable, beginner-friendly
Editing and Cleaning Up Your Recorded Audio
Raw cassette recordings need attention before burning to CD. Here’s the editing workflow:
Step 1 — Noise Profile and Reduction Capture 2–3 seconds of tape hiss from a silent section of the tape. Use this as a noise profile in your software’s noise reduction tool. Apply noise reduction conservatively aggressive settings destroy audio quality along with the hiss.
Step 2 — Track Splitting Identify the gaps between songs and mark split points. Most recording software lets you place markers during playback and then export each section as a separate file. Name files clearly artist, album, track number, and title.
Step 3 — Level Adjustment Use normalization to bring each track to a consistent volume level. Target approximately -1dB peak normalization for CD output.
Step 4 — Fade In and Out Add short fades 0.5 to 1 second at the beginning and end of each track. This eliminates abrupt starts and clicks that occur at edit points.
Burning Your Converted Audio to CD
This step trips up more people than any other part of cassette CD conversion. The critical distinction:
Audio CD vs Data CD this difference matters enormously.
An Audio CD burns files in the standard Redbook CD format that every CD player reads. A Data CD stores files as computer data — readable by computers but not by standard CD players. Always burn as Audio CD unless you’re creating a disc specifically for computer playback.
CD burning best practices:
- Use name-brand blank CD-R media — cheap discs have higher error rates
- Burn at 8x speed or slower — faster burning increases error rates
- Use CD-R not CD-RW — rewritable discs are less compatible with older players
- Verify after burning — most burning software offers a verify option; always use it
- Burn two copies — one for use, one for archiving in a separate location
Professional Cassette CD Conversion Services
When to Choose a Professional Service
DIY conversion makes sense for many situations but professional services earn their cost in specific circumstances:
- Severely deteriorated tapes requiring restoration equipment beyond home budgets
- Large collections converting 50+ tapes DIY requires enormous time investment
- Irreplaceable recordings where failure isn’t an option
- Sticky shed syndrome requiring professional baking and specialized playback equipment
- Time constraints professional services handle batches efficiently
What Professional Cassette Conversion Services Offer
Quality professional services bring capabilities that home setups simply can’t match:
- High-end tape decks with calibrated playback Nakamichi, Revox, and similar professional-grade equipment
- Professional audio interfaces with superior analog-to-digital converters
- Dedicated noise reduction and restoration hardware
- Experienced audio engineers who understand tape-specific problems
- Multiple output formats — CD, MP3, FLAC, WAV simultaneously
- Track splitting and labeling services
- Archival packaging — jewel cases with printed inserts
Cost of Professional Cassette CD Conversion
| Service Level | Cost Per Tape | Includes |
| Basic conversion | $10–$15 | Digital files only |
| Standard with CD | $15–$25 | Digital files + 1 CD copy |
| Premium with restoration | $25–$40 | Restoration + files + CD |
| Archive quality | $40–$75 | Full restoration + multiple formats + packaging |
DIY vs Professional cost comparison:
| Factor | DIY | Professional |
| Setup cost | $50–$200 (one time) | $0 upfront |
| Per tape cost | Near zero after setup | $10–$40 |
| Time investment | High | Minimal |
| Audio quality ceiling | Very good | Excellent |
| Restoration capability | Limited | Professional grade |
| Best for | Large personal collections | Irreplaceable or damaged tapes |
Audio Quality in Cassette CD Conversion
Common Audio Problems in Cassette Conversion
Even well-preserved tapes present audio challenges that require attention:
Tape Hiss the constant background noise inherent to analog magnetic recording. Noise reduction software reduces it significantly without damaging audio quality when applied carefully.Wow and Flutter speed variations caused by worn tape transport mechanisms. Wow describes slow speed variations and flutter describes rapid ones. Both cause pitch instability that’s difficult to correct after capture. A good tape deck minimizes this problem at the source.
Dropouts brief moments where the audio disappears completely due to missing magnetic particles. Minor dropouts are unavoidable in aged tapes. Severe dropout problems indicate tapes beyond practical recovery.Speed Inconsistency if your tape deck runs slightly fast or slow, your recordings will be pitched incorrectly. Test against a known pitch reference before capturing important tapes.
Audio Restoration Techniques
“The goal of audio restoration isn’t perfection it’s preservation. A restored recording that sounds slightly processed is infinitely better than a degraded tape nobody can play.” Core principle shared among professional audio archivists
Effective audio restoration for cassette conversion follows a specific order:
- Noise reduction first — establish a clean noise floor before other processing
- EQ correction — boost lost high frequencies common in aged tape recordings
- Dynamic range adjustment — normalize levels for consistent playback volume
- Click and dropout repair — use spectral repair tools for isolated damage
- Final limiting — gentle limiting prevents digital overs on the final output
Cassette CD Conversion vs Digital File Conversion
Should You Convert Cassette to CD or Digital Files?
Honestly? Do both. The marginal effort of creating digital files alongside your CD is minimal and the benefits are significant.
CD advantages:
- Physical backup independent of hard drives or cloud services
- Universal playback without software
- Excellent longevity when stored properly
- Allows sharing with relatives who do not subscribe to streaming services.
Digital file advantages:
- Easy backup across multiple locations
- Playback on phones, computers, and streaming devices
- Searchable and organizable in music library software
- Takes zero physical storage space
Cassette to MP3 vs Cassette to CD
| Factor | Cassette to CD | Cassette to MP3 |
| Audio Quality | Lossless (16-bit/44.1kHz) | Lossy compression |
| File Size | ~650MB per disc | ~60–100MB per album |
| Playback Compatibility | Universal physical | Universal digital |
| Long-term Archival | Excellent | Good (use 320kbps minimum) |
| Recommended Use | Primary archive | Everyday listening copy |
For archival purposes, always capture at lossless quality first WAV or FLAC and create MP3 copies from that master. Never use MP3 as your primary archive format. Compressed audio permanently discards information that can’t be recovered later.
Tips for Getting the Best Results from Cassette CD Conversion
Common Cassette Conversion Mistakes to Avoid
These errors consistently produce disappointing results:
- Recording at wrong sample rates — always use 44.1kHz for CD-destined audio
- Burning as data disc instead of audio CD — most common beginner mistake
- Aggressive noise reduction — destroys musical detail along with hiss
- Skipping tape deck cleaning — dirty heads kill high-frequency response
- Not making backup copies — one CD copy is not an archive strategy
- Using a worn or cheap tape deck — garbage in, garbage out applies completely here
- Ignoring input levels — clipping during capture ruins recordings permanently
- Rushing the process — cassette conversion rewards patience and attention
Preserving and Storing Your Converted CDs
Best Practices for CD Storage and Longevity
A converted CD is only as good as how you store it. Disc rot the oxidation of the reflective layer inside CDs destroys discs over decades. Proper storage dramatically extends disc life:
- Store vertically in jewel cases — never stacked horizontally
- Keep in stable temperature — avoid attics, garages, and cars
- Maintain 40–50% relative humidity — too dry causes disc brittleness
- Keep away from direct sunlight — UV light accelerates disc degradation
- Never write on discs with ballpoint pens — use soft felt-tip markers designed for CDs
- Handle discs by the edges only — fingerprints on the data side cause read errors
Creating a Backup Strategy
The 3-2-1 backup rule applies perfectly to converted music archives:
- 3 copies of every recording
- 2 different storage media types — CD plus hard drive, for example
- 1 offsite copy — cloud storage, a relative’s home, or a safety deposit box
One CD sitting in your living room isn’t preservation. It’s a single point of failure. A house fire, a flood, or simple disc rot eliminates it entirely. Redundancy is what preservation actually means.
Frequently Asked Questions About Cassette CD Conversion
How Much Does Cassette CD Conversion Cost?
DIY conversion costs $50–$200 in equipment setup mostly a quality tape deck and audio interface. After that initial investment, per-tape costs drop to near zero. Professional services charge $10–$40 per tape depending on service level and restoration requirements.
Can I Convert a Cassette to CD Without a Computer?
Yes. All-in-one cassette to CD converter devices handle the entire process without a computer. These standalone units contain a built-in tape deck and CD burner. Audio quality is acceptable for casual recordings though serious archival work benefits from a computer-based workflow.
How Long Does Cassette CD Conversion Take?
Real-time capture means a 90-minute tape takes 90 minutes to record. Add 30–60 minutes for editing, track splitting, and burning. Budget 2.5 to 3 hours per tape for thorough DIY conversion. Professional services typically turn around batches in 1–3 weeks depending on volume.
What Is the Best Quality Method for Cassette to CD Conversion?
The highest quality approach combines a well-maintained vintage tape deck Nakamichi, Sony, or Aiwa decks from the 1980s and 1990s often outperform modern budget units with a quality USB audio interface and careful recording in 24-bit WAV format before exporting to CD-standard 16-bit files.
Can Damaged Cassette Tapes Be Converted to CD?
Many damaged tapes can be recovered with proper preparation. Sticky shed syndrome responds well to baking. Broken tapes can be spliced. Moldy tapes can sometimes be cleaned carefully. However, tapes with severe magnetic particle loss or physical destruction may be beyond practical recovery regardless of technique.
How Long Will My Converted CDs Last?
Properly stored name-brand CD-R media lasts an estimated 50 to 100 years. Cheap or poorly stored discs may fail in as little as 10 to 20 years. Manufacturer estimates are optimistic real-world longevity depends heavily on storage conditions and disc quality.
Should I Convert Cassettes to CD or MP3?
Convert to both. Capture lossless audio first and burn to CD as your primary archive. Then create MP3 copies at 320kbps for everyday digital listening. This strategy gives you archival quality storage plus convenient digital access without compromise.
Conclusion
Cassette CD conversion isn’t just a technical project. It’s an act of preservation saving irreplaceable pieces of personal history from the slow, inevitable decay of magnetic tape. Every tape in that dusty box holds something worth keeping. A voice. A song. A moment that nobody documented any other way.The process is straightforward. The tools are accessible. The cost is reasonable. What isn’t reasonable is waiting another year while those tapes degrade further. Magnetic particles don’t care about your intentions they shed whether you act or not.Pick the method that fits your situation. Go DIY if you have the time and technical interest. Hire professionals for your most irreplaceable recordings. Use an all-in-one device if simplicity matters most. But whatever you choose start now. Your future self will be genuinely grateful you did.