
When you’re finishing drywall, the difference between a flawless paint job and an uneven mess often comes down to one simple choice, what grit to sand drywall with. Choosing the right sandpaper grit can make or break your project. It’s the line between silky smooth walls and visible seams that ruin the final look.
This in-depth guide explains everything you need to know about drywall sanding from grit numbers and techniques to tools, tips, and common mistakes to avoid.
Understanding Sandpaper Grit, What Do Those Numbers Mean?
Before diving into which grit to use, it’s important to understand what sandpaper grit actually means. Grit numbers indicate the coarseness or fineness of sandpaper. Lower numbers (like 60 or 80) are coarse and remove material quickly, while higher numbers (180 to 240) are fine and designed for smoothing surfaces.
| Grit Type | Range | Purpose |
| Coarse | 40–100 | Stripping rough surfaces or shaping |
| Medium | 120–150 | General sanding between mud coats |
| Fine | 180–220 | Finishing and smoothing before painting |
| Extra Fine | 240+ | Polishing or ultra-smooth surfaces |
For drywall, you should never use coarse grit. It’s too aggressive and can gouge or tear the paper surface of your drywall. The ideal range lies between 120 and 220, depending on your sanding stage.
What Grit to Sand Drywall After Mudding
After applying drywall mud (joint compound), you’ll need to sand it to remove ridges, seams, and imperfections. The right grit changes depending on which coat you’re sanding.
Best Grit for First Sanding (After the Second Coat)
Start with 120- to 150-grit sandpaper. This range removes uneven spots and tool marks left by your drywall knife without damaging the drywall surface beneath. If you notice deeper ridges or heavy buildup, use 120 grit to level them out, then move to 150 grit for a smoother result.
Best Grit for Final Sanding Before Painting
Once your walls are mostly smooth, switch to 180- to 220-grit sandpaper for the final pass. This step polishes the surface and removes micro-scratches, giving the wall that “ready-for-paint” feel. Always test under bright light or sunlight to ensure no imperfections remain.
Pro Tip: Use a flashlight held at an angle against the wall. Shadows will reveal bumps or lines you might otherwise miss.
Choosing the Right Sanding Tools for Drywall
Your sanding tool matters almost as much as your grit selection. The right combination helps you work faster, control dust, and maintain even pressure.
Common Tools for Drywall Sanding
| Tool | Best For | Pros | Cons |
| Sanding Block | Small areas and touch-ups | Easy control | Slower for large surfaces |
| Pole Sander | Ceilings and high walls | Covers wide areas | Harder to control near edges |
| Electric Drywall Sander | Large jobs | Fast and efficient | Requires dust collection system |
| Sanding Sponge | Corners and curves | Flexible and gentle | Can wear out quickly |
If you’re working in tight corners, sanding sponges are your best friend. For larger rooms, an electric drywall sander with dust extraction saves time and keeps your workspace cleaner.
Step-by-Step Guide, How to Sand Drywall Smoothly
A professional-looking wall depends on technique, not just tools. Follow these steps for smooth, consistent results.
- Prepare the area.
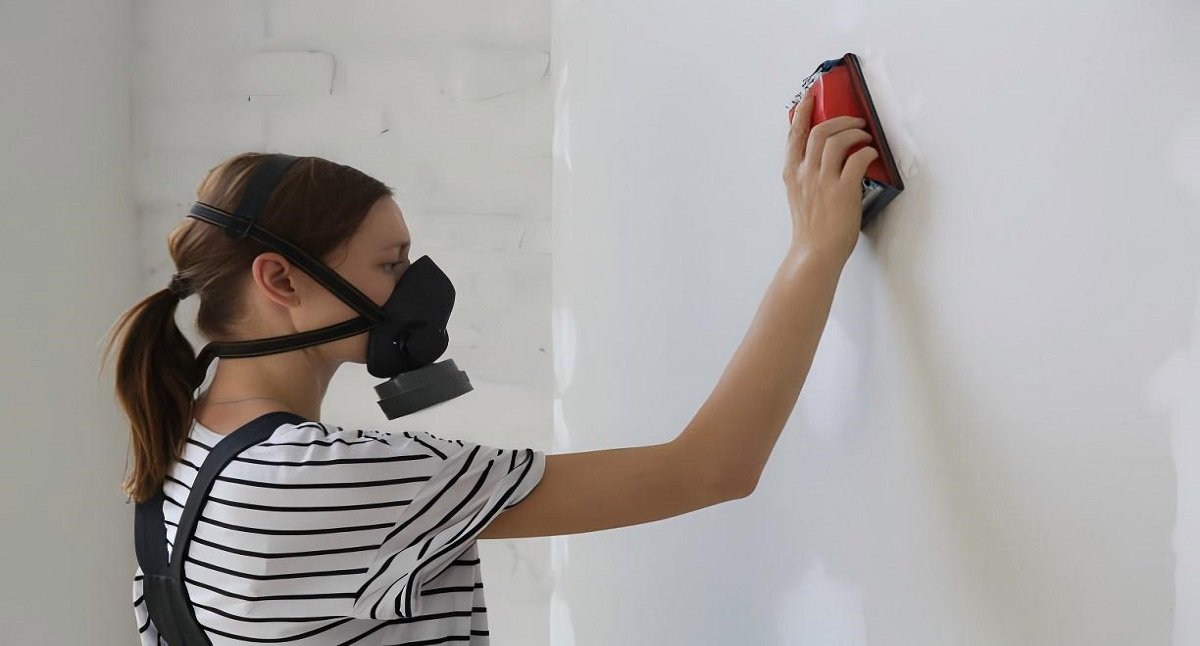
Cover floors and furniture with plastic sheeting. Wear goggles, gloves, and a dust mask drywall dust can irritate your lungs and skin. - Start with medium grit (120–150).
Focus on seams and joint areas first. Move your sanding tool in gentle circular or back-and-forth motions. - Feather the edges.
Blend the joint compound into the drywall surface so there’s no visible ridge between the two. - Switch to fine grit (180–220).
Once the wall feels even, switch to finer grit to polish it smooth. - Check your work.
Shine a light at an angle to spot imperfections. - Clean up dust.
Use a damp cloth or vacuum to remove drywall dust before applying primer.
Common Mistakes When Sanding Drywall (And How to Avoid Them)
Even experienced DIYers make small errors that can lead to visible flaws later. Here’s what to avoid:
| Mistake | What Happens | Solution |
| Using too coarse a grit | Gouges and paper tears | Never go below 120 grit |
| Over-sanding seams | Exposes drywall tape | Apply extra mud, then re-sand lightly |
| Skipping grit steps | Uneven texture before paint | Always go from medium to fine grit |
| Not cleaning dust | Paint adhesion issues | Wipe walls with damp cloth |
| Sanding without light check | Hidden bumps or ridges | Inspect under side lighting |
Expert Quote: “Drywall sanding is like art if you rush, the flaws will show forever.” David Ruiz, Professional Drywaller (2023)
When to Stop Sanding, Signs Your Drywall Is Ready for Paint
Knowing when to stop is key. Over-sanding can expose the paper layer, forcing you to start over. You’ll know your drywall is ready when:
- The surface feels smooth under your fingertips.
- Seams and joints blend seamlessly into the wall.
- There’s no visible sheen difference between mudded and unmudded areas.
- Dust wipes away easily with no raised edges.
Before painting, always apply a coat of primer. Primer seals the porous surface and ensures even paint absorption.
Expert Tips for the Perfect Finish
Here’s how professionals achieve that flawless, magazine-worthy look:
- Sand between coats lightly. Don’t skip intermediate sanding — it keeps each layer smooth.
- Work under bright light. Imperfections are easier to see and fix.
- Use a sanding sponge for corners. It molds perfectly into edges without tearing tape.
- Wet-sanding for less dust. Dip your sponge in water and wring it out before smoothing.
- Keep movement consistent. Random, rough sanding creates visible patterns.
Pro Tip: Don’t press too hard. Let the grit do the work.
Final Thoughts — The Right Grit Equals the Right Finish
Getting the perfect drywall finish isn’t magic. It’s about knowing what grit to sand drywall and using it at the right stage. What Grit to Sand Drywall may seem like a simple question, but it’s the foundation of a flawless, professional-looking wall. Start with 120–150 grit for shaping and smoothing your compound, then finish with 180–220 grit for that flawless surface.
Patience pays off. A properly sanded wall sets the stage for stunning paintwork and lasting beauty.
Grit Comparison Table for Drywall Sanding
| Grit Number | Type | Purpose | When to Use |
|---|---|---|---|
| 80–100 | Coarse | Removes heavy buildup | Rough shaping only (avoid for final drywall passes) |
| 120–150 | Medium | Smooths seams after mudding | Main sanding stage after 2nd coat |
| 180–220 | Fine | Finishes surface before paint | Final sanding before priming/painting |
| 240+ | Ultra-Fine | Polishing primer or repairs | Optional final pass for ultra-smooth finish |